Having been running this blog for a year, I'm going to go right back to basics. This is going to be a brief series on general principles and methods of exercising, and as new year resolutions are right around the corner, this should be a helpful go-to guide. In it I'll cover:
Part 1 -- Goal Setting
Part 2 -- Resistance Training Focus
Part 3 -- Cardiovascular Training Focus
Part 4 -- Selecting Starting Loads
Part 5 -- Selecting Starting Exercises
Part 6 -- Warming Up
Part 7 -- Stretching
Selecting Starting Loads
For the most part, this will apply to resistance training, although the same principles (without the numbers) can be used for cardio. This is a fairly reliable method for setting up your initial working weights. Continuing in the vein of Part 2 of this series, I'll use 12-15 as the target rep range, but note that this same method can be used for anything between about 5 and 15 reps, and the same principles can be used outside of that range, although some modifications may be necessary.
When selecting your starting weight for any given exercise, always err on the side of caution. If you're hyper-conservative and pick a weight that's way too light, you can always add more weight afterwards. If you go the other way, you can cause all sorts of trouble for yourself. If you have a trainer guiding you through this (ahem, plug), they should be able to make some reasonable guestimates about what will be appropriate loads for you to use, but they should still be testing your strength, body awareness and response to cuing, as I'm about to describe, so a good trainer will still generally get you started with weights that are too light, and then work their way up.
After doing a general warm up, you're going to take the lightest load you can practically use for your given exercise. Depending on the exercise, that might be an empty barbell or little 1kg dumbbells, or it might be your body weight, or it might be the lightest plate in a pin-loaded machine, or it might even be some form of assistance.
Having received basic instruction on the exercise, and being aware of your main cues, take that light load and perform a set, focusing on your cues. This set will generally end in one of 4 ways:
1) Despite making a conscious effort to adhere to technique, you find yourself struggling to do so, and your form degrades before you reach 12 reps. This is technical failure, which is distinct from muscular failure, in that you have the strength to continue moving the weight, but can no longer move it well.
2) You successfully adhere to technique, but the load is more than you're ready for, and you reach muscular failure before 12 reps (this is much rarer than option 1 when starting out, although that will also depend on the exercise in question).
3) You complete 12 reps while adhering to your cues, but are not sure that you could do much more.
4) You complete 12 reps while adhering to your cues, and are confident you could do at least 2 more reps.
If 1) or 2) happens, complete the rep you're on if it's safe to do so (if you have a trainer helping you, they can give a more reliable call on this than you probably can yourself; likewise they can probably identify when you're not adhering to your cues more reliably than you can), and then finish the set immediately. Take note of which rep you failed on, and then subtract that number by 2, and that'll be your starting number of reps. So, if you failed on rep 10, start out doing sets of 8 with your starting weight. Progress 1 rep/set at a time until you work your way up to sets of 15 (always putting technique ahead of sets and reps, since the goal of the 12-15 rep range at this stage is to get a lot of technical practice -- reps in which you don't deliberately practice good technique at this stage are teaching you to use bad habits, instead). In this example, you should be using the same weight for at least 9 workouts: workout 1 = test starting weight; wo2 = sets of 8; wo3 = sets of 9; ....wo9 = sets of 15. That's assuming you don't have to delay progressing your reps in order to keep technique in order.
If 3) happens, you've found your starting weight. Again, progress by adding 1 rep/set at a time, provided you get all your reps with passable technique.
If 4) happens, then increase the weight slightly, rest, and then repeat the test with the new weight. Keep adding weight until 3) happens. If you go too far and 1) or 2) happens, take a step back and set your last successful weight as your working weight.
Having been running this blog for a year, I'm going to go right back to basics. This is going to be a brief series on general principles and methods of exercising, and as new year resolutions are right around the corner, this should be a helpful go-to guide. In it I'll cover:
Part 1 -- Goal Setting
Part 2 -- Resistance Training Focus
Part 3 -- Cardiovascular Training Focus
Part 4 -- Selecting Starting Loads
Part 5 -- Selecting Starting Exercises
Part 6 -- Warming Up
Part 7 -- Stretching
Resistance Training Focus
So, you've established your goals and figured out you're going to have to move some sort of heavy object/s to achieve them. Excellent.
You won't have to search very far to find information resembling the following as a guide for how to handle your resistance training based on your goal:
Endurance 15+ reps
Hypertrophy 6-15 reps
Strength 1-5 reps
Power 1-5 reps
As someone who's new to training, the above guide doesn't really matter a whole lot. Yep, I just said that. Right now, you could do 50-rep sets of an exercise, and you would get hypertrophy, strength and power out of it. Likewise, you could practice your 1RM (which I don't advise without strict supervision and strict definitions of what counts as a successful lift, basically determining technique degradation as failure) and get more power, muscle and endurance out of it. Heck, you could probably look at a barbell, imagine lifting it 3 days a week, and that would be enough to build more muscle mass.
Instead, the following is what you actually need to worry about:
- TECHNIQUE: This is going to come before everything else right now.
- SAFETY: This comes with both practicing good (or at least sensible) technique and using sensible workloads.
- PRACTICE: It's said that it takes about 300-500 repetitions with deliberate good technique in order to learn a movement pattern. Whether or not that's accurate, the main point is that you want to practice your movements a lot. A LOT.
- THINKING: Or lack thereof. As a beginner, you generally don't know how to move your body very well, which means that to make the above 3 things happen consistently, you're going to need to think a lot about your key cues for the exercises you're doing. You're primary goal is going to be to get to the point where you don't have to think as much about each exercise, to the point that you only need to focus on one cue and everything else just falls into place. Starting out you'll be thinking a lot; you want to get to the point where you're not thinking much at all.
Once you reach the point at which you don't have to think much about each exercise, you've reached the first level of mastery. Now it's time to start thinking about training specifically for endurance, hypertrophy, strength or power; or to advance to a more complicated exercise which builds on the skills you've just mastered.
Referring back to technique, safety, practice and thinking, a good starting point is often the upper end of the stated hypertrophy range, with beginner programs often advising sets of 12-15. If you're doing sets in that rep range, then the weight is going to be relatively light (compared to, say, 1-5 reps), which is relatively safe. The caveat to that is that you want to be practicing good technique and thinking through your cues on every rep. Your mental focus, and your control over both your prime movements and your supporting muscles throughout the range of motion of an exercise, will limit how many reps you can realistically perform. If you can perform 12-15 reps per set with consistent adherence to your main cues, I'd recommend it. If not, don't. Your ability to maintain technique will be the limit of how many reps you do, and of how much weight you use. So you might only be doing 5 reps of an exercise starting out, not because it's heavy, but because your technique degrades beyond that point. Practice those 5 reps, and then progress onto 6 reps, then 7, etc. Keep building up the reps, and building up your discipline with each rep. Now, looking at the estimation on how long it supposedly takes to learn a movement, once you get up to a consistent 12-15 reps per set, doing 2-3 sets you're looking at up to about 20 workouts before you're likely to have reached that first level of mastery. If you're doing a full-body program and you're doing the same exercises each time, 3 days a week, that's about 7 weeks before it might be time to start worrying specifically about strength, hypertrophy, power or endurance. Of course, it could take more or less time than this.
Point is, your primary goal right now is simply to learn movements -- increased strength, endurance, power and hypertrophy will flow naturally from this, simply because you're learning to do more than you could before and exert yourself in ways you're not used to.
Having been running this blog for a year, I'm going to go right back to basics. This is going to be a brief series on general principles and methods of exercising, and as new year resolutions are right around the corner, this should be a helpful go-to guide. In it I'll cover:
Part 1 -- Goal Setting
Part 2 -- Resistance Training Focus
Part 3 -- Cardiovascular Training Focus
Part 4 -- Selecting Starting Loads
Part 5 -- Selecting Starting Exercises
Part 6 -- Warming Up
Part 7 -- Stretching
Goal Setting
"Yay, it's the 2nd of January, my hangover's over, and I'm going to get fit!"
Excellent, and what does that mean?
"What?"
What does it mean to get fit?
"You know, fit! I'm gonna get fit! You know?"
Okay, and what will be different once you are fit? How is this going to change you?
"Oh, I'm going to be 10kg lighter and I'm going to be able to run 10km and I'm going to be able to bench press 100kg."
Excellent. You've just set your first fitness goals. The first one is body composition, the other two are performance. The two performance goals are going to help with the body composition goal (although ultimately, it's going to take more than just improved performance to get there). These three goals you've just set are Specific and Measurable. This is very good, because we want to set SMART goals.
"Oh yeah, I love being smart. It's my third-favourite passtime."
Very good. Now, when we talk about SMART goals, we're actually talking about goals that have 5 elements to them:
Specific "I want to improve my bench press" is specific; "I want to get fitter" is not.
Measurable A good fitness goal is usually one in which you can observe the results in some objective way. Granted, that's not always the case ("I used to be unable to bend over without pain but now I can" doesn't really have a number to it, but is still a very worthy pursuit), but for the most part, numbers are good.
Action-Oriented The goal can't just be an end result, you actually need to do something to make that goal happen. This is where scheduling and logging workouts, modifying and logging diet, and getting a proper program put together implementing these pieces of the puzzle (there's a plug for my services in there somewhere) comes into play.
Realistic There's not much point in setting a goal that's unachievable. My recommendation is generally to set a goal that's within reach, but is actually going to demand that you reach for it. Something close enough that you can reasonably foresee it being done, but far enough away that you'll have to put in some effort to get there.
Time-Constrained There are short-term, mid-term and long-term goals. Whether your goal is for this week (short-term), this season (mid-term), or this year (long-term), most goals that fit into the rest of the SMART formula work best with a time element involved. This needs to be consistent with the other elements, of course: if you take a realistic mid-term goal and set it as a short-term goal, it's no longer realistic; if you take the same goal and set it as a long-term goal, you've just removed the urgency to take action.
"*nod nod* I see (tell me that once a week for the next 12 weeks and I think I might get it)."
Ironically, your inner monologue has just shown something close to a SMART goal: Specifically, you'll get it; the measurable factor is whether or not you get it; action involves me preaching to you once a week (between the lines, it also involves you listening once a week); it's realistic that through repetition you'll learn and understand the issue; and it's time-constrained on a short- and mid-term basis (weekly and seasonal).
Now, let's translate your fitness goals into SMART goals.
Instead of "I'm going to be 10kg lighter," it's now: "I'm going lose 10kg over the next 6 months. I'm going to do this by modifying my diet, logging my diet to make sure that I'm staying within the parameters of my diet, exercising at least 3 days a week, and targeting 0.5kg of weight loss each week."
Instead of "I'm going to be able to run 10km," it's now: "I'm going to be able to run 10km in 6 months time. I'm going to achieve this with the Couch to 5k program, followed up with weekly progressive overload to get from 5k to 10k."
And instead of "I'm going to be able to bench press 100kg," it's now: "I'm going to bench press 100kg in the next 12 months. I'm going to begin with learning technique on the empty bar (20kg) and practicing weekly progressive overload on a program designed by my trainer (yeah guys, I'm really subtle with this whole plugging myself thing), peaking 3-4 times throughout the year, and setting specific bench press goals for each season."
There are several different types of muscle fibres in humans. According to Wilmore, Costill and Kenney (2008), we have the following fibre types (and as research techniques develop, we may distinguish fibre types even further): "I; Ic (I/IIa); IIc (IIa/I); IIa; IIax; IIxa; and IIx." Clear as mud? Excellent.
For the sake of this post, we'll narrow that down to Type I, IIa and IIb (with IIb being more or less equivalent to IIx). Note that fibre types aren't so much a distinct classification as they are a sliding scale of qualities. Here's more or less what each of the above three types look like:
Type
I
Type
IIa
Type
IIb
Twitch
Slow
Fast
Fast
Colour
Red
Pink
White
Energy
Aerobic
Aerobic, anaerobic
Anaerobic
Power
Low
High
High
Endurance
High
Moderate
Low
Hypertrophy
Potential
Low
High
Debatable
The twitch is a full stimulus --> contraction --> relaxation period. Thus slow-twitch muscle fibres go through that sequence slowly, and fast-twitch fibres go through the sequence quickly. Type II fibres can typically go through 5 twitches in the time it takes a Type I fibre to go through 1 twitch. Type I and II fibres of the same length and width in the same location will produce about the same amount of force, but because Type II fibres can perform many more twitches in the same duration, they can produce much more power.
The colour of the muscle is directly related to the energy source. As aerobic energy sources use blood oxygen, aerobically dense muscle fibres are red. As anaerobic energy sources don't use blood oxygen, anaerobic muscle fibres lack redness. As aerobic energy pathways allow long-duration tasks, while anaerobic pathways do not, the colour of the muscle fibre is also related to its endurance.
The hypertrophy potential of the muscle fibres is an interesting issue. Hypertrophy seems to occur when two training conditions are met:
1) Adequate load is placed on the muscle fibres.
2) Adequate volume is placed on the muscle fibres.
I'm not sure how much biological potential slow twitch fibres have for hypertrophy, but from a loading perspective, we run into an immediate problem: they can't take much load, and with the load that they can take, it's really hard to wear them out.
As for Type IIb fibres, I'm led to believe that biologically they do have high potential for hypertrophy. The problem, however, is that their is very low, and exposing them to high training volumes may promote them converting to Type IIa fibres. Following this is how impractical it is to expose Type IIb fibres to high volume. If we assume the classic hypertrophy vs max strength rep ranges (6-12 = hypertrophy; 1-5 = strength; in reality, just like fibre types, this is actually a sliding scale), the closer we get to max strength and thus focusing on white fibres, the less reps we can do in a set. Let's take the extreme and compare 12 rep sets vs 1 rep sets. In a standard hypertrophy workout, you might do 3-5 sets of 12, for 36-50 total working reps, and that might take you 10-30 min, depending on intensity and rest periods. In contrast, with enough weight on the bar to make heavy singles worth doing (probably 90% 1RM), you're looking at 3-5 min between sets, maybe longer as you get fatigued, which means it would conservatively take you 36 min plus actual lifting time just to make up the volume of the first hypertrophy set.
For these reasons, focusing on Type IIa (pink) fibres is far more practical when it comes to hypertrophy. I don't know if they are biologically better at hypertrophy than white fibres (ie, given the same volume, I'm not sure that pink fibres would still grow faster than white fibres), however their combination of being both fast-twitch and decent at endurance makes them generally the easiest fibre type to hypertrophy. Moving closer to max strength (white) loads makes it hard to accumulate sufficient volume for hypertrophy. Moving closer to endurance (red) loads makes it hard to apply sufficient intensity for hypertrophy.
All around us, fitness marketing offers fast results. Some of the extravagant claims I've heard or read have been: gain 10lb of muscle in 2 weeks; and lose 1kg per day. Mmmm, wouldn't that be nice.
Of course, reality is, those results don't happen. If you want to gain 10lb of muscle, you're looking at 6-12 months of training as a beginner, and even longer if you're advanced. That's not what anyone wants to hear, but it's the truth. Just imagine if you could gain that much muscle in 2 weeks -- you'd make Ronnie Coleman look like a sissy within a year!
Likewise, if you lose 1kg per day, it's fairly safe to say that you're losing a lot of fat-free mass. Since I assume you want to lose that weight to be less fat, I hope you'll understand why losing fat-free mass is a waste at best, and detrimental at worst.
When you compare reality to the market-driven attitude of "I want it all, and I want it yesterday," reality looks quite disappointing. But you know, the funny thing is, when you pursue reality instead of a fantasy, you actually get quicker, better results. Yes, you just read that correctly: Ryan is claiming that the pursuit of slow (ie realistic) results will get you better results than the pursuit of quick fixes. There are a few reasons for this.
1) If you try gaining weight too quickly in the pursuit of muscle, you pile on excess fat. This requires more time cutting fat later on, during which you will likely stop gaining muscle or even lose muscle.
2) If you try losing weight too quickly in the pursuit of fat loss, you will lose more than just fat.
3) Combine points 1 and 2 together, and after 6 months of bulking and 6 months of cutting, you're right back where you started, more or less.
4) If you understand that results will come slowly, and you expect this to be the case, you'll actually appreciate the results that you get. The person who drops 20kg in 6 weeks, still looks crappy in their own eyes, and then quits and returns back to their pre-transformation lifestyle will gain back the weight lost, and will often gain back more. The person who expects it to take a year for them to lose 20kg is more likely to appreciate it when they get halfway there after 6 months and can do their belt one or two notches tighter. When they lose the full 20kg, instead of thinking "I'm getting nowhere; this is pointless," they'll think "wow, I actually did it! This is amazing!"
5) Fast results are what you pursue when you want the end product but don't want what it takes to get the end product. Slow results are what you pursue when you know that this is a journey and a lifestyle transformation, not just a change in what stares back at you in the mirror. If you dedicate 6 weeks to losing 20kg, it's usually with the intention of returning to normal behaviour afterwards (when your normal behaviour is what's made you need to lose 20kg in the first place). If you dedicate 52 weeks to losing 20kg, the activities involved in the process will become a habit and lifestyle by the time you've lost 5kg.
There are probably other factors to consider as well. But the point is, the person who is committed to getting slow results will actually get real results, and is more likely to maintain those results and/or move on further along their fitness journey, whereas the person who pursues fast results is more likely to get fake results and quit once disillusionment settles in.
The Dead Zone is a body fat range. Exactly what range it is will vary from person to person, and probably varies even in the same person at different stages in life. Basically, it's a range in which progress in both muscular gains and fat loss are highly obscured to the untrained eye.
For the average guy, this is about 12-18% body fat. For women, I'm not sure what range it is, so I'll do what I normally do with women's body fat percentages and add 10, so I'll guestimate 22-28%.
The Dead Zone is where people can move from low body fat % towards high body fat % and honestly think it's all lean mass, or from high body fat % towards low body fat % and honestly think that they aren't losing any fat -- it's all muscle that they're losing (or so they think). In essence, this is the range in which sharp definition of the muscles is obscured by fat, but the shape of the muscle underneath is not obscured much by the fat, so a little more fat just makes the muscle look bigger, and likewise, a little less fat just makes the muscle look smaller.
At lower body fat %'s than the dead zone you get "ripped," "shredded," "lean" physiques. At higher body fat %'s, you get some far less desirable adjectives.
The implications of this are:
1) If you can't see your abs with crystal clear definition and you're gaining weight, you may be in for a sobering disappointment when, after 3 months of gaining "one pound per week of lean mass" you wake up and discover you're closer to a keg than a 6-pack. If you're bulking, do it slowly.
2) As you lose weight, as you pass through the dead zone, it can be fairly demotivating. We're all paranoid of losing dat dere gainzzz, which causes a lot of people who've bulked up through the dead zone to start cutting in the dead zone, think they're losing their muscle mass, and promptly switch back to bulking. So be aware of the dead zone, stick to a sensible diet for your goals, keep training, and trust that you'll be alright when you come out the other side.
3) You're probably a whole let skinnier and fatter than you thought. Congratulations.
If you've been around fitness long enough, you've probably noticed a few different methods of breathing while exercising. If you haven't, then the thought probably hasn't crossed your mind yet that how you breathe matters. Fair enough -- it's not something you normally think about in every day life. That is, until you start reading about breathing, and then become acutely conscious of every single breath entering and leaving your body. Or is that just me right now?
There are four approaches to breathing that I'll be covering here.
The first is the casual, don't-think-about-it variety. This is best left for cardio. If you're activity is light enough for you to breathe through your nose without thinking about it, you don't need to think about it. Once cardio gets intense enough that you start breathing through your mouth...you still probably don't need to think about it, unless you have something like asthma (nasal breathing results in slower breathing due to smaller pathways; it also results in the inhaled air being warmer, cleaner and moister by the time it reaches the lungs, which is all relevant if cold, dirty, dry air is a problem). This variety of breathing tends to become more problematic when it comes to strength training.
If you have cardiovascular issues, the safe way to breathe during strength training is to inhale on the eccentric and exhale on the concentric. Due to the strenuous nature of strength training, people often need to be reminded to breathe, as momentary strenuous work and holding your breath tend to go together. The issue for people with cardiovascular issues, especially high blood pressure, is that strenuous activity increases blood pressure, and so does holding your breath. Put the two together and it might be time to say your goodbyes. Breathe fluently throughout the exercises, on the other hand, and you might live to fight another day. This is the most common method of breathing recommended in gyms (in my experience).
The Valsalva maneouvre is literally not for the faint of heart. This method of breathing makes use of the tendency to hold your breath under strenuous load. While it depends on the lift, the Valsalva maneouvre is generally performed by taking a deep breath and holding it before the lift begins, and either holding that breath until the rep is completed or exhaling only once you've passed the hardest point in the lift. This breathing pattern allows greater tightness in the trunk than breathing in on the eccentric and out on the concentric, making it ideal for maximal strength work, but it does spike blood pressure, so only use it if your health permits.
The last method I'll mention is to take the Valsalva maneouvre but hold the breath for more than one rep. This isn't just "not breathing" while you lift -- you're strategically inhaling deeply at the right time and holding it. I personally find this is best left for moderate weight, higher rep sets than max strength work, but your mileage may vary. Depending on the exercise, I'll often get 2-5 reps at a time out of a 10+ rep set while breathing this way. This is an extension of the Valsalva maneouvre, so if it's not safe for you to do Valsalva, it's not safe to do this.
It's everyone's favourite muscle group. The biceps (strictly, biceps brachii; you also have biceps on your legs) are funny muscles. They have two origins, giving them a long head and a short head up at the shoulder, and an insertion down onto the forearm. Specifically, the long head travels through a sheath in the front of the shoulder then attaches back into the glenoid tubercle, the short head attaches onto the coracoid process, and the distal end attaches onto the proximal end of the radius. Here are some pictures to point out where the thingamjigs attach to the doohickeys.
Now that I've turned you into a braindead mullet with that anatomy lesson, here are the implications for the above information:
1) The origins of biceps are on the scapulae, so, while they aren't very good at it, the biceps are involved in shoulder flexion.
2) The insertion is on the forearm bone that likes to rotate. Specifically, the biceps are an important muscle in supination.
When it comes to exercise, this tells us that when we do curls (for the gurls), a supinated grip will create a greater peak contraction than a neutral of pronated grip (these grips, in turn, cause other elbow flexors to get a good workout; this isn't a bad thing). Moving from neutral or even pronated throughout the ROM might (on paper) be even better, although that hasn't been my personal experience. Keeping the shoulders slightly flexed throughout the ROM will also allow a greater contraction.
This also means that, while pull ups and rows are great compound exercises that work the biceps, some form of isolation exercise would be good to polish things off, because pull ups use a pronated grip and move the shoulder into extension rather than maintaining flexion.
If that picture isn't clear, the intention is that when you use heavy weights (relative to your 1RM), you'll use few reps, and when you use light weights (again, relative to your 1RM), you'll use more reps.
Basic programming tends to use "sets across," in which you select a weight and then try to use the same amount of reps at that weight across multiple sets (eg 3x10x100kg). In pyramid workouts, however, you use multiple working weights, and as such multiple rep ranges. The three primary forms of pyramid workout are:
1. Pyramid up (classic pyramid)
2. Pyramid down (reverse pyramid)
2. Pyramid up and down (full pyramid)
Pyramid up (classic pyramid)
In the classic pyramid, you will begin the workout with a weight that allows you to use relatively high reps. With each additional set, you will add some weight and decrease the amount of reps performed. An example of this would be: 10x100kg, 8x10⁵kg, 6x110kg, 4x115kg, 2x120kg.
Pyramid down (reverse pyramid)
In the reverse pyramid, you will begin the workout with a weight that allows you to perform very few reps. With each additional set, will take some weight off and increase the amount of reps performed. An example of this would be: 2x140kg, 3x130kg, 5x120kg, 6x110kg, 10x100kg.
Pyramid up and down (full pyramid)
In the full pyramid, you will begin the workout with a weight that allows you to use relatively high reps. With each additional set, you will add some weight and decrease the amount of reps performed until you reach a target weight or rep range. You will then reverse pyramid back down to lighter weights and higher reps. And example of this would be: 10x100kg, 8x10⁵kg, 6x110kg, 4x115kg, 2x120kg, 3x110kg, 5x100kg, 12x90kg.
Why would I do pyramids?
From what I've read, the classic pyramid isn't very effective for maximal strength or athletic training, because each set accumulates fatigue, limiting performance as the weights increase (so, you get to sets where you can only do 1-3 reps of the exercise, but with a weight that's closer to your 5-8RM). However, it's my understanding that (for reasons that, ironically, I don't understand) this method can be rather productive for building muscle mass.
The reverse pyramid seems to be a little more productive for max strength training, because the heaviest sets can be performed properly. The additional sets with lighter weights then allow the lifter to build up a higher amount of volume, which may be useful for practicing technique and promoting hypertrophy.
For the same reasons that classic pyramids aren't usually ideal for max strength, full pyramids aren't, either. However, like reverse pyramids, full pyramids do allow the lifter to practice technique and accumulate more volume, which is again good for hypertrophy.
Another benefit to pyramid training is that since it allows you to work at different loads and in different rep ranges, different motor recruitment patterns can be utilised, different muscle fibres fatigued, and different energy pathways activated, providing the lifter with a broader scope for progress.
There are a lot of ways to squat with a barbell. A lot. Like, a really big amount. Barbells are versatile equipment, and squats are a versatile exercise. So I'm only going to cover a few different kinds of squat.
For the sake of brevity (and making it easier to learn if you're building on my previous post), we'll continue with the same stance. This alone culls a lot of different squat variations which use a wider stance, narrower stance, staggered stance and even one leg off the floor entirely.
So, the same technique points covered in body weight squats apply with barbell squats:
- Set heels shoulder-width apart and turn toes out slightly.- Lift chest and contract abs.- Look straight ahead.- Spread the floor with your feet and push your knees out throughout the movement.- Keep your tailbone lifted.- Sit down onto the air between your legs and then come back up by driving your heels down and chest up.
If you've already learned goblet squats, then the first barbell squat variation to learn is the front squat. Front Squats There are two main ways to do the front squat: the Olympic style and the crossover style. In the Olympic style, you will set your hands just outside of shoulder width on the bar. You'll want to set the bar so that it's held up by the deltoids, with the fingers lightly supporting. Some people can get all four fingers on the bar, but most will only be good for two or three fingers, depending on flexibility and individual anthropometry. Your elbows should be pointing straight ahead, with your arms roughly parallel to the ground and parallel to each other. You don't want to choke on the bar, but you do still want your elbows to be up high. A common mistake in this style of front squat is to try and grip the bar in your palms. Remember, you only want your fingers touching the bar, and they're only there for a bit of support.
The crossover style is convenient for those who lack the forearm flexibility to use the Olympic style front squat. In this method, you'll still point your elbows up and forward, but instead of having your fingers outside the shoulders, you'll cross your left hand over onto your right shoulder, and your right hand over onto your left shoulder.
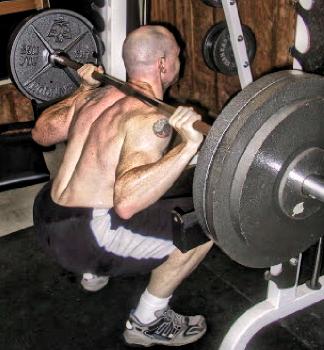
In both variations, begin with the barbell in the squat rack. The rack should be set so that the bar is at about mid-chest height. People often set the bar too high in the rack, which results in having to calf raise their way in and out of the rack. Not a big deal with light weights, but when the weights get heavy, this can result in some brilliantly failtastic experiences. Step up to the rack and set your feet so that you can stand straight up with the bar (due to the weight of the bar, if your feet aren't set up right you'll either move forwards or move backwards when you unrack the bar). Set the bar evenly across the front of the shoulders, lift your chest, take a deep breath, brace your whole body and stand up straight. Take a couple steps back (don't go for a walk with the bar if you don't have to), make sure your feet are properly set (shoulder width apart, toes slightly out, one foot isn't further forward than the other), and squat. Having a weight loaded onto the front of the body has some interesting effects. It changes the centre of gravity so that to prevent yourself from falling forwards (or dumping the bar forwards), you'll have to remain a little more upright than in body weight squats. The consequence of your torso remaining upright is that your hips won't drift far back, which means your knees will have to go further forwards if you're to hit full depth, which means your calves will be in for more of a stretch than other squats would provide. Some calf stretches (as well as some calf raises to strengthen the new-found ROM) may be in order here, although another option is to have your heels elevated. In the coloured picture above, the Olympic lifter is wearing Olympic weightlifting shoes, which set the heels about an inch higher than the toes. In the black and white photo, the lifter has his heels elevated on a thin block. By decreasing the distance that the hips drift and increasing the distance that the knees drift, emphasis is taken out of the hips and into the quadriceps. Technique points (beyond those of body weight squats): - Hands evenly placed. - Elbows up. - Bar resting on anterior deltoids. - If using Olympic style, fingers just touching the bar rather than gripping it. - Don't choke. Back Squats Just as there's more than one way to do a front squat, there's more than one way to do a back squat. Here are some of the variables you can play with: 1. Bar placement 2. Hand placement 3. Type of grip Bar placement So, there are two bar placements that I'm qualified to speak about. The first is the high bar or Olympic bar placement. This is up on the upper trapezius, just below the big bone at the base of your neck. This bar placement is conducive to a relatively upright torso position (although not as upright as the front squat), which is why Olympic lifters tend to use it -- it has good carry-over to their front squats and competition lifts. I've found it good to squeeze my shoulder blades back and very slightly up to get a good shelf with my upper trapezius for this variation. This position is generally easy on the shoulder joint, but can make the upper trapezius very sore, especially if it's your first time.
High bar squat
The second bar placement I can talk about is typically referred to as a low bar position, however, in light of the placement I can't talk about beyond a theoretical analysis (and experience beyond theory is important for this type of discussion, thus why I consider myself unqualified to discuss that kind of low bar squat), this is perhaps more accurately described as a mid bar squat. This position sits the bar across the top of the posterior deltoids. It's not as friendly on the shoulder joint as the high bar squat, but it does provide greater stability (assuming you've got decent posterior deltoids to tighten up and make a solid shelf). Having the bar lower on the back tilts the torso further forward in order to maintain proper balance, which increases ROM at the hips and results in more glute and hamstring work. Many people approach high and low bar squatting with completely different techniques, which is fine. Some think this is required (I used to be one of them), which isn't correct.
The version of low bar squatting that I'm not qualified to talk about sits the bar (if my understanding is correct, which it probably isn't) in the groove between the deltoids and the triceps. Again, this causes a further forward tilt, more hip flexion, and greater glute and hamstring work. I've observed lifters having more difficulty fully extending their hips at the top of the squat using this technique. I couldn't tell you how it feels or what it's like trying to become proficient in this method. From what I've observed, this technique is mostly only used by powerlifters, and (if I recall correctly) some powerlifting federations don't allow it in competition. Whatever the bar placement, at heavy weights the lifter will always want to keep the bar over the middle of the foot, or else s/he can expect to fail. And get laughed at. Hah! Hand placement Hand placement is related to bar placement, in that the higher the bar, generally the closer the hands can comfortably be, thanks to these things in our forearms called bones (same reason why the further back the hips go, the less the knees will come forwards, and the more the knees come forwards, the less the hips will travel back). As a general rule, you should aim to have your hands as close together as you can comfortably get them. The closer they are, the closer you can keep your elbows to your back. The closer your elbows are to your back, the tighter you can squeeze your trapezius and deltoids, making a tighter shelf for the bar to sit in, making the bar more stable. In saying that, what's appropriately close for me may be too close for you, or may be too far out and cause a loose shelf. There are various competitive lifters who have their hands out as far as they can go on the bar. I'm not sure if it's because this is still as close as they can bring their hands, or if they have a different reason for having their hands out that far. If you're curious, you could always try asking them. Wherever you put your hands, set them evenly on the bar, unless you have unusual bodily issues that require you to do otherwise. Grip type You've basically got two options here: thumbs around or thumbs over. Thumbs around makes use of your opposable digits, thumbs over treats your thumbs like fingers. I use thumbs over, many people use thumbs around. I used to think that this was a really important thing, but I'm progressively becoming less convinced that this is the case. What I think really matters is that you aim to keep your wrists straight, pull the bar into your back, and grip the bar tightly. Technique points (beyond those of body weight squats): - Hands evenly placed. - Make a solid shelf by squeezing your shoulders together. - Pull elbows into sides. - Pull bar into back. - Squeeze bar tightly. Notes on breathing With body weight squats, it's not particularly important that you breathe any particular way, so long as you do in fact breathe. With barbell squats, breathing becomes more important. There are two methods you could use, depending on health status and goals. The first method is to breathe in the eccentric (while you're squatting down) and out on the concentric (while you're standing up). This is fine when the weights aren't too intense. But, when you're using heavy weights, this method won't suffice. For heavy lifting, provided it's medically okay to do so (some conditions, such as hypertension, make this risky), take a deep breath in at the top and hold it throughout the set. The act of holding a deep breath will increase intra-abdominal pressure, which in turn will help you to brace harder through the core and get your through sticking points. Exhale at the top, and take another deep breath at the start of each rep. If you use a lifting belt, you'll want to hold your breathe during each rep. The belt works by having the abs pushed out against it, which happens while you hold a deep breath. Exhaling will generally result in the pressure against the belt decreasing, reducing the belt's support.
Most people, if asked to squat on their first day in the gym, will not feel comfortable with it, and their attempts to squat will be rather ugly. There are a few generic reasons why untrained novices suck at this movement:
1. They may lack the strength to squat.
2. They may lack the flexibility to squat.
3. They may lack the coordination/balance to squat.
4. They may lack the confidence to squat.
Most people, starting out, probably do lack the confidence. Often, they'll lack the confidence because they believe that they lack the flexibility and balance to squat, and they'll confirm this belief when they attempt to squat and can't get all the way down and up again in a fluid movement. However, in my experience, it's very often a case of low confidence preventing them from moving naturally. They don't trust that they can do the movement, so they overthink the movement and throw a large dose of inhibitions in the way, preventing themselves from going down properly, thus removing any possibility of coming up properly, either.
There are several paths around this. The path that I used (unintentionally, because I was taught that going below 90 degrees at the knees is bad) was deep leg presses and partial squats. When I finally decided to start squatting to parallel, I had developed enough body awareness and confidence that it was an easy transition. If you're not in a hurry to learn parallel squats, this is a viable option, and if the first reason not to do full squats (that you lack the strength for it) is true, then it may even be a necessity.
Coach Mark Rippetoe teaches a useful method of leg pressing
for someone who wants to learn to squat.
Yep. This was me.
If you do want to get on with learning deeper squats, then here's a much quicker method I developed after watching a Dan John seminar back in the day.
Wall Squat Drill
- Stand against a wall, facing away.
- Set your feet so that the back of your heels are about in line with the front of your pelvis, and are shoulder-width apart. Turn your feet out, each 15-45 degrees from parallel (30-90 degrees from each other).
- Slide down the wall as far as you can while keeping your hips and shoulders against the wall. Keep your knees out, pointing in the same direction as your toes.
- When you get to the bottom, spend some time down there holding that position (this will require you to activate your leg muscles), getting used to that depth. It will probably feel uncomfortable as your thigh muscles are simultaneously stretched and contracted, and you'll likely feel a lot of lactic acid accumulating in your quadriceps rather quickly. Keeping your hips and shoulders against the wall may also result in you activating your glutes and trunk muscles, which you'll need when it comes to actually squatting.
- Stand up out of that position. Get someone to give you a hand up if needed.
It may seem like I've just described a typical wall squat, but not quite. Typical wall squats have your feet way out in front, so that you end up with 90 degree angles at the hips and knees. Instead, I'm recommending that your feet be closer to the wall so that your knees have to move out over the toes and your glutes come down towards your heels.
If you can do the above drill, then you definitely have the flexibility in most muscles to squat. Calf flexibility might be an issue, but other than that, the ROM's there. Standing back up will also demonstrate the required strength, and getting used to the position will develop some coordination and confidence. Do the above wall drill a few times, then, once you're confident with it, make the following adjustment:
Wall Squat to Air Squat Drill
- Once set at the bottom, push yourself forward so that your weight is over your feet, rather than locked between your feet and the wall.
- Set your posture by lifting your bum slightly (actually, thinking of lifting your tailbone might be a better cue) and lifting your chest. I find it easiest to make use of this position by putting my hands out in front, which allows me to be a little more upright.
- Once you've established your posture at the bottom, stand straight up.
When you perform air squats, always remember to be pretty.
Voila, you've now learned how to do body weight squats. Other methods, like the one I used that enabled me to do my first parallel squats, can take a long time to get you doing full squats. But with this method I've managed to teach several people (who watched me demonstrate squats and said: "I can't do that") to do full ROM body weight squats in a matter of minutes.
I suspect that what makes this method work is that we're generally confident with standing, but not so much with being at (or getting down into) the bottom of a squat. By sliding down a wall, we get into that bottom position with support behind us the whole way. Once we move forward from the wall, we're in the bottom position of a squat. By standing up straight from there, we learn the path between the bottom of the squat and standing upright, and so it's mentally much easier to trek back and forth along that path. That's my theory, anyway.
Once you've got that up and down path figured out, it's now time to start thinking about technique points.
Body Weight Squat Technique Points
- Set heels shoulder-width apart and turn toes out slightly.
- Lift chest and contract abs.
- Look straight ahead.
- Spread the floor with your feet and push your knees out throughout the movement.
- Keep your tailbone lifted.
- Sit down onto the air between your legs and then come back up by driving your heels down and chest up.
A lot of sources say to begin the squat by breaking (unlocking) first at the hips, then at the knees, and sit back. In my experience and observations, this appears to work well for sumo squatters with good body awareness. For beginners with a narrower stance (as I'm teaching here) this seems to result more in lower back/pelvic rounding, which is something we want to resist. So, for now at least, just go up and down, sitting between your legs.
Alongside body weight squats, it can help to do goblet squats. Goblet squats are traditionally a kettlebell exercise, but can be done with a dumbbell, or even without weight (making them just a specific way of doing body weight squats). In the goblet squat, you take a weight (real or imaginary) and hold it to your chest with both hands, keeping your elbows in against your sides. At the bottom of the goblet squat, your elbows should brush against your inner thighs, which helps to cue keeping the knees out. Goblet squats can also help with learning to keep your chest up.
Goblet Squats
Now that you're getting up and down and developing technique, it's time to accumulate a lot of reps. How many? Well, "they" say that it takes 300-500 repetitions of a new exercise performed well to ingrain the technique, and 3,000-5,000 repetitions to fix a bad motor pattern. So, I won't prescribe a specific amount of sets and reps to do in each session, but I will say that you should be emphasising technique. You might only be doing 5x5 in your first session, despite possibly having the strength and endurance to do much more. Use technique as a gauge to determine whether you should continue the set you're on or rest for a minute before doing it again.
Over time, build up to being able to do 3x20 with consistent technique. Early on, you'll find yourself struggling with all the technique points to focus on. Chest up! Tailbone up! Knees out! Spread the floor! Drive through your heels! Abs tight! It's a lot to take in (remember, goblet squats may make some of these cues easier to cover). The need to think is one of the more frustrating parts of being a beginner. Persevere, and in time you'll reach a point where you don't have to think as much about what you're doing and how you're doing it. This is the first level of mastery, and you want to reach it before you start using barbells or squatting to failure. It's wise to achieve this level before adding intensity to your squats (through heavy loads and approaching failure), because there's additional technique in how to position the barbell (so you want to get the general movement down before you add even more stuff to think about), and technique starts to break down towards failure (so if you get into the habit of approaching failure before you're ready for it, you're more likely to develop bad technique habits).
Coach Nick Horton discusses the first level of mastery.
As a programming point, I would like to see people achieve 3x20 good body weight squats on 5 separate training sessions before they touch a barbell. This may seem like an overly conservative approach, but I'd really like to see people develop a solid foundation before they go making things harder for themselves. Those 5 sessions should be close together -- I'm talking a period of 1-2 weeks. I've never enforced this before with anyone I've trained, but looking at the struggles people tend to have once the barbell gets added into the mix, it's something I would like to trial with any future beginners I work with. In theory at least, 3x20 across 5 close sessions demonstrates that technique is pretty well locked in. At this stage, it should be on the verge of second nature to set your feet up, lift your chest, sit down between your legs, drive your knees out and keep your bum lifted. The frustration of trying to get it right shouldn't be there anymore. Furthermore, by doing it over 5 sessions, the 300 reps to ingrain technique are being covered (on top of all the reps it took to get to that stage). And if you can do 3x20 and be good to go 1 or 2 days later, it shows that you have the strength to handle an empty barbell on your shoulders. So then, it's time for the next chapter in your lifting journey.
Back when I worked in a commercial gym, I'd often catch my colleagues sitting down for half an hour planning their next client's workout. As a general rule, taking the time to think about what your client needs and how you can structure that is a good thing. But when there's nothing special about your client (no health issues that require specific programming, no injuries, the client's goals revolve around general fitness and looking better naked), do you really need to spend that much time on each client's next workout?
For the average client with average goals and no special circumstances, here's a simple template you can follow for each workout:
1. Legs 2. Push 3. Hinge 4. Pull 5. Abs or Loaded Carry
Now, let's pick a few different exercises you can do for each of those 5 categories of exercise:
1. Legs:back squats, goblet squats, leg press, step ups 2. Push:bench press, overhead press, push ups, dips 3. Hinge:deadlift, RDL, hyperextension, bridge 4. Pull:pull ups, lat pull downs, rows, upright row 5. Abs/Loaded Carry:sit ups, planks, side bridge, farmer's walk
So, that's 5 movement types, and 4 exercises per movement type. That's hardly an exhaustive list, mind you. I could quite easily list off at least a couple different variations of each exercise on that list, still without really thinking about it. And there are plenty more movement types you could consider. Very often, when trainers early on in their careers spend so much time thinking about the next workout when there's nothing that they need to specifically worry about other than keeping things balanced, it's because they believe that they need to use a lot of different exercises each session in order to keep the clients coming. Depending on the clients, this may be true, although that isn't an absolute statement. Nonetheless, with 5 movement types and 4 exercises per movement type, you've got literally hundreds of different workouts that you could potentially give your clients.
That's not taking into account coaching, the many different options for progression (increasing weight, increasing reps, increasing sets, increasing ROM, decreasing rest, etc), "advanced" techniques, exercise arrangement (3x10 sets across, supersets, circuits, targeting reps, targeting time, etc) and the many other variables that you can play with.
It's my opinion that a fair amount of forethought should be given early on, but if you're spending a lot of time planning every single session when there isn't a clear need for it, then perhaps you should be focusing that attention on more pressing matters. If you understand exercise programming and have a well-reasoned system sorted out, then (for the most part) less time should be spent thinking about what to do next, and more time should be focused on how to use what's coming next.
Jim Wendler is one of the powerlifting greats who has walked the walk and now writes to help other aspiring lifters along the way. Wendler is one of the few people who has squatted 1,000lb, so he might have some experience we can learn from. In this article we'll look at the program itself (briefly) and then my thoughts on it.
The Program
His program 5/3/1 is a fairly simple 4-week cycle, that looks something like this (other variations of the program exist, so this isn't the only version of it out there):
You'd start the program with ~90% 1RM as your training max, so all of the above %'s are based on that 90% figure (ie 5+ x85% = 5 or more reps at 85% of 90% 1RM), and then in each training cycle add a tiny bit of weight onto your training max.
You would train 4 days a week (ideally), with each day dedicated to a different lift (the vanilla lifts of the program are squat, bench press, deadlift, and overhead press), followed by a pile of assistance work. There are various assistance work protocols covered in the original 5/3/1 for raw strength manual, and I assume there are many more assistance work protocols covered in the 5/3/1 for powerlifters and 5/3/1 for bodybuilders manuals. One of the most common assistance work protocols is BBB: Boring But Big. This protocol is to simply take two exercises (one of them being the main lift) and do them for 5x10. Wendler recommends starting out light with the assistance work, so this 5x10 might only be at about 50% training max when you begin the program.
So, with a 1RM of 200kg (training max of 180kg), a squat day in the first week with BBB might look something like this:
As I said before, after each cycle, you would increase you training max slightly with each cycle of the program. You'd be looking at about a 2.5kg increase on the upper body lifts and a 5kg increase on the lower body lifts each month, which doesn't sound like much, but adds up to 30kg/60kg over the course of a year (on paper, at least).
Thoughts
5/3/1 is very neat and tidy, with clear progression built in, recovery, and auto-regulation (by seeing how many more reps you can achieve after the first 5, 3 or 1 in the top set). Progression, recovery and auto-regulation are good things. There also tends to be a lot of volume in the assistance work (although that depends on just what you do for assistance), which also has its benefits. There's definitely a lot of praise I can give for to this program.
However, it's been my personal experience that 1 set demonstrates strength, and additional sets build strength. While everything you do in the gym has its contributions, there's a very clear single set in each session which really counts, and that's the heaviest set of the main lift. The only lift of mine that's challenged this notion is my deadlift, but at the same time that 1 heavy set of deads was allowing me to improve on them next week, I was doing roughly 10 heavy sets of squats throughout the week, plus a lot of pull ups. But whenever I've worked with programs that have used 1 heavy set for everything, nothing has improved. 2-3 work sets, on the other hand, has been a formula for success with me.
Running in that same vein, I have done 5/3/1 before, and would you like to guess where I did make improvements? My assistance work! The top end of my strength plateaued throughout the program, but my mid-range strength increased each week. And of course, it's in the mid-rang that I was doing lots of sets.
One of the aspects of the program that's both a big pro and a big con is that you get to decide what to do for assistance work. On the bright side, this results in a very personalised program. On the down side, if you aren't firmly grounded in how to balance out a program in a way that is conducive to your goals and that prevents injuries, you don't have much place in choosing assistance work you'll do.
It should go without saying, but what works for me won't necessarily work for you, and vice versa. So don't take my experience as proof that you shouldn't try the program -- many people have and in doing so have had great results.